Tuesday, December 27, 2022

Joy card

 I hope everyone is enjoying their holidays! I made this card using Pinkfresh Studio’s “Oh, What Fun!” Collection. I used their Jeff Alpha dies to cut out the word JOY from a sheet of shiny gold paper. Super simple but I love how it turned out. Im entering this in the December 2022 Pinkfresh challenge found here: https://www.pinkfreshstudio.com/blogs/card-making-challenges/december-2022-challenge 

Happy New Year!


Wednesday, May 5, 2021

iNSD 2021

Well, it's been a minute since I've blogged, hasn't it! This year's National Scrapbooking Day inspired me to go out and find some challenges and they need me to link up, so let's put this blog back to work for at least one day!

Pinkfresh Studio is a company I discovered only last year. Their products are beautiful. They have some challenges up that are due on May 13th. If you happen to have some Pinkfresh product, then you should give them a try and link up as well! I used papers from "Everyday Musings" and embellishments from "Office Hours".

The challenges I am entering are Challenge #8 - Borders with Sophie, and Challenge #10 - Circles with Brianna. For the border, I used my Knock Out Punch and punched notebook paper borders. And then the circles were easy, I have lots of circle embellishments.

The other inspiration for my layout came from Stacy Julian's Story52 class. Have you heard of this class? you pull cards from 4 different categories and then use that to create your layout. The class goes all year, you can still sign up, look out for discounts that Stacy occasionally offers. 

The Story52 cards that I pulled were:

1. Category - Places we love (my office)

2. Start with - Product (Pinkfresh Studio office themed products)

3. Say it with - Interview (I wrote questions for myself to answer)

4. Laugh out Loud - My title "The Office" is a bit punny


Thanks so much for looking!


Thursday, April 9, 2015

Sweet Stamp Shop Grand Re-Opening


Hey everybody, I've got some fun news today -- Sweet Stamp Shop is having a grand re-opening event that starts TODAY! Head over to the Sweet Stamp Shop blog to get more details. I know there will be giveaways and discounts, and you don't want to miss their brand new website!

To help kick things off there are dozens of designers (including me!) that have created a project using Sweet stamps. Be sure to visit all of the designers blogs and leave a comment for a chance to win a $25 gift certificate to the shop!

On to the project I'd like to share today.  I used 2 stamp sets on my card, Balloons and Happy Birthday. Both are great staples in my stash of stamps. Birthday cards are by far the type of card I make the most, and with these sets there are endless possibilities for card designs.


I stamped the balloons with various shades of Memento ink. I like that the ink impressions weren't completely solid with these balloons. It makes them look a bit transparent and the balloons overlap nicely. After stamping the balloons and sentiment I added some silver rub-on stars by Pink Paislee, give the card some shimmer.

Remember to leave a comment here for your chance at a $25 gift certificate to Sweet Stamp Shop. Head back to the blog to visit the other guest designers, and you'll want to follow Sweet Stamp Shop on Facebook and Instagram to hear about all of the ways Nicole will be celebrating her grand re-opening this month! (Yes -- ALL MONTH LONG!) I'm so excited, aren't you!?!

Thanks for stopping by!


Monday, March 30, 2015

Paper Girls Party Decor Blog Hop

Good Morning, everyone! We are hopping at the Paper Girls Challenge Blog today, hope you will come join us! You won't want to miss it, we've got a generous prize sponsored by Unity Stamp Company! See all of the details below.

Have you noticed that many of the major scrapbooking manufacturers have added Party Decor to their product line ups?  Well, if you've got a little time and a little paper and other crafting supplies (ok ok, I have a LOT of paper).... you can easily make your own decor like I have here.

I put my Cricut to use to cut out most of the shapes in my party decor. The cartridge I used is called "Once Upon a Princess"


To make the teapot and teacups stand up, I just folded and adhered a little piece of card stock to the back to make my own stand. And then to make the garland I adhered punched circles and stars cut with my Cricut, sandwiching some twine in the middle. 


To turn the bow and crown into photo props, I just taped a wooden skewer to the back. This little holder was originally packaging for several rolls of washi tape. I simply chose some coordinating washi colors to wrap around it and now I have a cute prop holder.


And that's it for me today, I hope you enjoyed my projects!


PGCB PARTY DECOR BLOG HOP DETAILS:

Visit all of the blogs listed below for your chance to win a fabulous prize pack from Unity Stamp Company (worth $86!!):
  1. Paper Girls Challenge Blog - http://thepapergirlschallenge.blogspot.com/
  2. Cathryn H. - http://www.catscrapcreations.blogspot.ca
  3. Brittany M. - http://craftypaperbee.blogspot.com
  4. Amber S. - http://allamberallthetime.blogspot.com/
  5. Michele D. - http://about-the-paper.blogspot.com
  6. Erica B. - http://stampingstarlette.blogspot.com/
  7. Karrie S. - http://sweetscrapsbykarrie.blogspot.com/2015/03/pink-tie-party.html
To be eligible to win, you must do the following:
  1. Comment on each of the blog posts along the hop 
  2. "Like" the Paper Girls Challenge on Facebook
  3. Follow the Paper Girls Challenge Blog
For your chance to win, blog comments are needed by Sunday, April 5th at 11:59pm MST to comment. We will announce the winner on Wednesday, April 8th at 9:00am MST.

Enjoy the hop and good luck!!


Monday, March 16, 2015

Paper Girls - Shakers

Hey everyone! I'm here with the newest challenge at The Paper Girls Challenge Blog.  Today Cristine is challenging us to create a project with a shaker.  If you're not sure how to do this, go to Cristine's blog, she has a little tutorial up to show you.

I took a look through my supplies and found a frame by Sweet Stamp Shop that I thought would work nicely as my shaker base and created this card:


It really came together much easier than I expected, so if you've never tried a shaker card I encourage you to give it a shot!  You've got just about 2 weeks to create your project and link up, hope I see you over there.

I haven't blogged much since December, but don't worry, I'm still crafting. I spent much of December creating my December Daily album. And then in January I started to do Project Life on a weekly basis. I have to say I am loving it. I resisted it for a long time because I thought it would be overwhelming, but I really enjoy writing down little stories of what we are doing in our family each week. Let me know if you'd like me to share DD and/or PL pages here, and I can do that.

Hope you all have a fantastic week!


Monday, December 15, 2014

Paper Girls - Ornaments

Are you ready for something festive? I got my house all decorated early this year and even went in search of more Christmas items for my mantel and dining room. Love it! Well, if you are feeling as festive as I am, check out my challenge starting today at The Paper Girls Challenge Blog.

Here's one of the ornaments I created. I used a Cricut cartridge called Gingerbread. And sure, you can use it to cut out gingerbread cookies, but I think the shapes make for some fun decorations, in this case, ornaments.


You've got almost 3 full weeks to complete this one, entries are due by January 3rd.

Monday, November 3, 2014

Paper Girls - Mixed Media

A new challenge begins today at The Paper Girls Challenge Blog.  The theme is Mixed Media, so have fun with this one!

I've got several cool mixed media tools like gelatos, stencils, mists and gesso in my stash, but I honestly don't break them out very often.


To create my card, I first misted some watercolor paper with Mister Huey's mist (color: Sunset). I applied quite a bit and then used a paint brush to spread the color over the whole sheet.  After it dried, I used a couple of Teresa Collins stencils and Faber-Castell whipped spackle to create the white sentiment and hearts. After this layered dried I felt like I needed to add something so got out my Mister Huey's Opaque White mist. I had intended to just add some splatters of white but I accidentally spilled a bunch of mist right on top of my creation! I saw that the white was blending nicely with the color already on there, so got out a paintbrush and started to spread the white around until I achieved the look I wanted. I love how it turned out, even better than my original idea of adding splatters!


Get messy and join in on our challenge, won't you?

Saturday, November 1, 2014

Paper Girls - Anything Goes

Today is the last day to link up to the current Paper Girls Challenge Blog challenge.  This time it is Anything Goes, so feel free to link up any crafty creation you've made in the last week!

Here's my layout:


The collection I used is My Mind's Eye Jubilee Tangerine. I snagged the whole collection at an excellent price at the MME warehouse sale a couple months ago. All of the patterned papers are from the 6x6 paper pad and then I just added some fun embellies, all on a white background.

Thanks for taking a look and get ready for the next Paper Girls challenge on Monday!

Monday, September 1, 2014

Paper Girls - Back to School

Happy Labor Day, everyone!

Perfect time for a Back to School Challenge, don't you think? Maybe you'd like to create something to stick in your child's lunch box, or an encouraging note for his/her backpack. Maybe a card for their new teacher? Or a layout to showcase those first day of school pictures? Have fun with Erica's challenge at The Paper Girl's Challenge Blog!

I made a card using this fun set "Learning Curve" by The Alley Way Stamps. Just color up and cut out some images and layer them on. The patterned papers are "Dewey Decimal" by Lawn Fawn.


Hope you can join the challenge!


Sunday, August 31, 2014

The Secret Garden Layout

You may have noticed that I made a Secret Garden mini book a couple of weeks ago. I'm going to send that mini to my mom as a gift, so I thought I'd use some of the same pics on a layout, using the same BasicGrey Mint Julep collection.

I'm entering the Paper Secrets August 15th Challenge, using this sketch:

And using the following elements in the word CAMP:
C -- Chevron ribbon
A -- Photos of my daughter Ana
M -- Mint green letter stickers
P -- Pink paper

Here's my layout:


Thanks for taking a look!


Monday, August 18, 2014

Paper Girls - Choose your own challenge


Jessica's got a fabulous challenge idea today at The Paper Girls Challenge Blog, Choose Your Own!  Just take a look at this grid and choose 3 different squares to include in your project. The squares don't even have to be in a row, any 3 will do.


I decided to use these three:
1) Make a Card
2) Include Flair
3) Washi

Here's my card. The little dragon image is from Sweet Stamp Shop's Dragon set.


Come play along, won't you?

Friday, August 15, 2014

Sweet Stamp Shop Mini Album

I'm sharing a mini album on the Sweet Stamp Shop blog today. The album theme is The Secret Garden. You can find pictures of the first few pages of the album at Sweet Stamp Shop, and I've saved a few pages to show right here. Take a look:


The stamp set I used on this mini is Elegant Flowers. If you missed it, I also used this stamp set a couple of weeks ago to make a Chalkboard Frame. Check it out.

Thanks for stopping by, and don't forget to visit the Sweet Stamp Shop blog today!


Monday, August 4, 2014

August Release at Sweet Stamp Shop


Happy Monday! And there is a good reason to be happy -- today is Sweet Stamp Shop's August Release, yay! All four stamp sets coordinate perfectly with each other and have a nautical theme. I think you are going to love them!

Here are the four new sets: 


Adorable, right?
I made this fun card using the new Fishy set and the older sets Easily DistractedToo Hip and Outline Alpha sets for my nephew's birthday:

I ended up sending the card late, so the 'easily distracted' part was quite appropriate!

This card was made with Sail Away Sayings:
I used a Zig pen and ruler to extend the reach of the lighthouse light, and sequins to add some sparkle to the stars.

Finally, I thought the sets would work so well on a traditional 12x12 scrapbook layout. I've used Sail Away Sayings and Ahoy!:


Do you recognize those wooden stars? They are from the first On Cherry Street Kit: Magical.

To get all of the details on the release and to see what the rest of the design team has been up to, please go visit the Sweet Stamp Shop blog

Thank you so much for stopping by today!

Paper Girls - Superheroes

I'm hosting the challenge that starts today at The Paper Girls Challenge Blog and the theme I've chosen is SUPERHEROES! Head on over there to get all of the details and to see all of the Design Team's fabulous creations!

I used a retired set by Sweet Stamp Shop with some fabulous superhero graphics and sentiments:


Hope to see you link up, I've got a prize to give to the randomly chosen winner!

Thursday, July 24, 2014

Paper Girls - Old photos

The Paper Girls Challenge Blog started a new challenge on Monday - Old Time Photos. Just pull out your old photos and use them on a project! (And by the way, Kristy's quite flexible in the definition of 'old').  

Well old photos to me are ones that are older than 4 years. Why 4 years? Because that's how old my daughter is, and I didn't really start scrapbooking until I was motivated to do something with all these pictures I had of her. So my scrapbooks are really all about her and only include recent pictures! Time to change that and get some other great memories down on pages!

Here's my college graduation picture and layout:


I love the Amy Tangerine Cut & Paste chevron paper I used for the background. But it was a little hard to figure out the embellies. In the end I kept them simple and added white enamel dots as a final touch. I really like how it turned out!


Do you guys regularly scrap older photos? Feel free to leave me links if you do, I really need to get some motivation to continue to do this!

You've got until August 2nd to link up at the Paper Girls, hope to see you over there!

Friday, July 18, 2014

Sweet Stamp Shop Foodie card

I'm using the Sweet Stamp Shop set Foodie today, both here and on the SSS blog.

I took some inspiration from fellow DT member Jenn Shurkus and used the stamped sentiments and words to create a background.


I love how black ink looks on kraft card stock! Thanks for stopping by, I hope you'll come visit me at Sweet Stamp Shop!

Monday, July 7, 2014

Paper Girls - Red, White and Blue

I hope everyone had a fabulous 4th of July weekend! Keeping with some patriotic spirit, Charity's challenge at The Paper Girls Challenge Blog today is to use red, white and blue in a project. You've got 2 weeks to link up.

I used a Teresa Collins stencil and some red and blue watercolor paint to create the hearts in my card background. Sentiment stamps are by Sweet Stamp Shop. Pretty simple, but I love how it turned out.


Go check out the other Paper Girls' projects, I think you'll find them really inspiring!

Have a great week!


Friday, July 4, 2014

Sweet Stamp Shop Flash Cards

I'm up on the Sweet Stamp Shop blog today with a little summer project, I hope you'll come join me over there!

I've also got a project to share right here, so read on!

Many of the latest stamp releases at Sweet Stamp Shop include an adorable animal or other whimsical image. Don't you think they are perfect for projects for kids? I combined some images from Artsy Fartsy, Stuck On This and Juggling Act with the Outline Lower Alpha stamp set to make flash cards for my 4-year old:


These cards are so easy to put together. Just cut some plain card stock and patterned paper down to 3"x4". Adhere them together, back to back, then round the corners. Add your colored stamped images and finally stamp the alphas on the cards.


Too cute, right? You could even make matching cards and play 'Go Fish'! 

Thank you for stopping by today, hope you find some crafty time this weekend in between 4th of July picnics and fireworks! And remember to visit me on the SSS blog!

Tuesday, July 1, 2014

July Release at Sweet Stamp Shop

Hey everyone, it's July 1st and it's Release Day at The Sweet Stamp Shop! I'm excited to be back designing with the Sweet Stamp Shop Design Team for July and August. It's so much fun to create projects with brand new stamps. I hope you like what the Design Team has created this time around with this really fun stamp release!

I made this card combining a couple of older stamp sets with a couple of the new ones:


Did you figure out which of the older sets I used yet? The banner and rays are from 'Dia de los Muertos' and the sentiment is from 'Easily Distracted'. And then from the new sets, the castle is from 'Royal Wish' and the stars in the background are from 'Enjoy Calligraphy'.

Here are the other projects I made with the new sets:


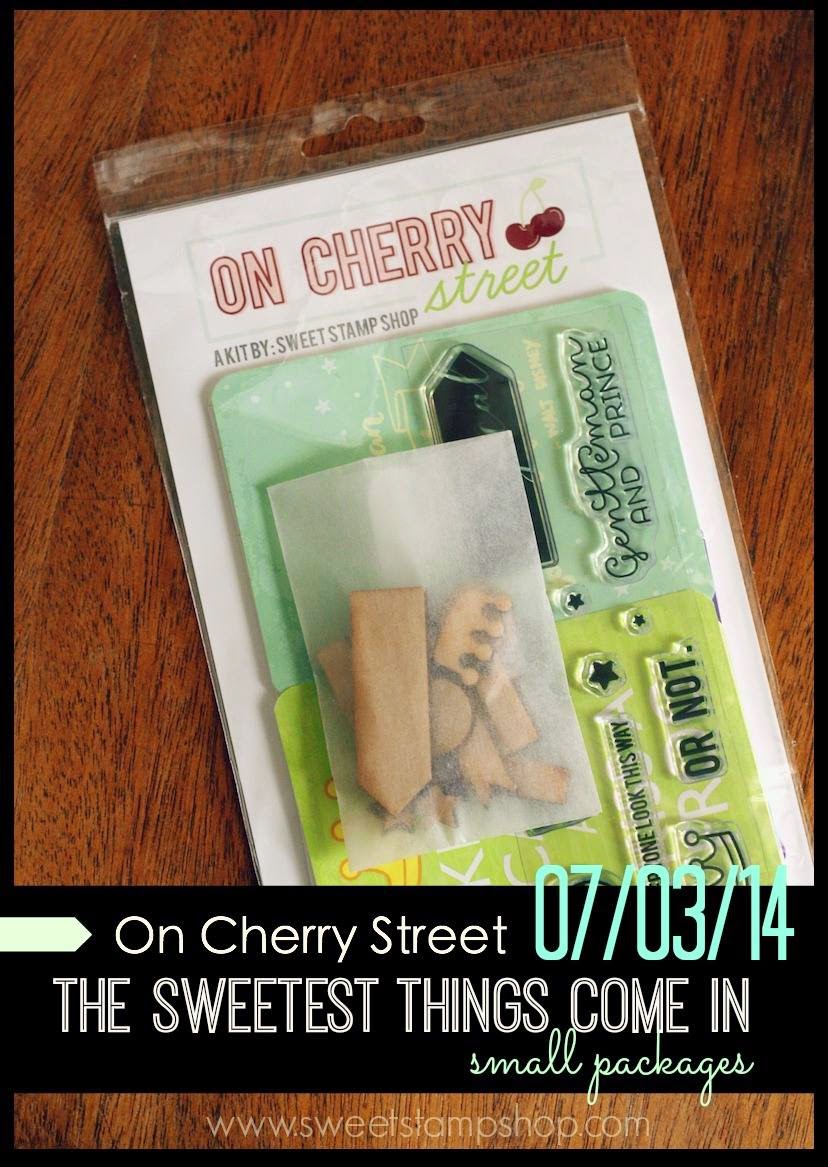
If you haven't already heard, Nicole is now creating a monthly kit "On Cherry Street" that includes stamps, 3x4 and 4x6 cards and embellishments. These kits coordinate with the other stamps being released that month, so for July we are talking royalty, magical, princes and princesses. I love it! Find out all the kit details on the blog.

Ready for the deal Sweet Stamp Shop has going on for TODAY ONLY?!? You can buy a bundle that includes all 4 brand new stamp sets plus the July kit (which includes a 5th stamps set) for $45. And be sure to use the code FREESHIP when ordering to get free shipping on that awesome bundle (for USA orders)! Kits and stamp sets go on sale individually tomorrow.

So what are you waiting for? Go get yourself a bundle of stampy goodness!

Saturday, June 21, 2014

The Challenge #9 - Happy Birthday

We're having a stamping party on the Stamping Forum at Two Peas in a Bucket - WSW14! (WSW stands for Worldwide Stamping Week.) Challenges are run by the members and members participate, it's a lot of fun and I have learned so many things from the Stamping Peas! One challenge happening right now is called Getting Sentimental. So that's the inspiration for this card.

This is the first time I put the Sweet Stamp Shop set "Happy Birthday" to use. I really wanted to do a subway art kind of look. I actually lined up all of the sentiments on my workspace first, then placed a large acrylic block over them so I could ink them up and stamp all at once. This ensured that I kept everything in line.

I'm pretty happy with how that turned out! Before I take the stamps off of the block, I think I'll have to ink up some more card stock with all the happy sentiments for future use.

I used The Challenge #9 sketch:
Thanks for taking a look today! If you are interested in stamping, I invite you to come over to the Two Peas Stamping Forum and see what's going on. It's a friendly group, and we invite you to jump right in with forum posts or participating in challenges! Hope to see you over there!


BLOG DESIGN BY DESIGNER BLOGS