Saturday, March 30, 2013

S.W.A.T. - Circus Card

Today is the 5th Saturday of the month, so we've got an extra challenge at S.W.A.T. The challenge is to make a circus-themed card, following the theme of Charity's beautiful circus tent album that she showed us last week. 

There is a prize for this challenge, an RAK of scrappy goodness, so be sure to play along! You have until April 4th at midnight eastern to link up your project.

Charity's tent project reminded me that I also own a bunch of MME Lost & Found 2 paper which would work beautifully for a circus-themed card. I have always admired my scrappy friends that color beautiful images with markers or pencils and then go on to create some beautiful and elaborate 6x6 cards with lots of layers. Truly stunning creations! Well, since these MME papers are so beautiful and elaborate on their own, I thought I might be able to do some layering and create something nice. I'm really happy with how it turned out, and it was very simple to make, a few paper layers, a chipboard sticker for the sentiment, and then some black i-rock gems in the corners. That's it!


Thanks for stopping by, have a great weekend! 
Posted by Picasa

Saturday, March 16, 2013

S.W.A.T. Drill #4 - Color Challenge


 S.W.A.T. Drill #4 - It's a color challenge!

Use this gorgeous color combo to create a project.


Here's my take, I used some Sweet Stamp Shop stamps (something of a theme for me this week, isn't it??) and some patterned papers to make this colorful and fun card.
 Patterned paper: Dear Lizzy 5th and Frolic
Stamps: Sweet Stamp Shop
Ink: Memento
Washi tape: My Mind's Eye
Brads: BasicGrey
Cardstock Base: Bazzill

You have until March 25th to complete your project using these colors and link it up at S.W.A.T.

The prize you are playing for this time is a $10 gift card to 3 Scrappy Boys!

Can't wait to see what you create!
Posted by Picasa

Friday, March 15, 2013

Sweet Stamp Shop Guest Designer

Hello and Welcome! 

If you came here today from the Sweet Stamp Shop blog, then you know that I'm a Guest Designer today! I am just thrilled beyond belief that I've had this opportunity to design for Sweet Stamp Shop this month with one of the new stamp sets. How fun is it to work with a completely new product? Plus I've been a huge fan of Sweet Stamp Shop for the past year or so, with a few (ok, 15!) of their stamp sets in my possession. I love to read the blog each day for crafty inspiration and for great ideas on how to use these stamps. Seriously. So. Fun.

So let's see if I can pass along a little inspiration today as well. I've got 2 more cards that I made with one of the brand new sets Chalkboard Sign. With the first one I tried to create a true chalkboard look, by heat embossing in white. The image embossed really nicely, let's just say mine is a brand new, clean chalkboard! I matted it on some patterned paper, kind of giving it a framed look, then added some cord and a brad, to give the effect of the sign actually hanging.


I think this next card is my favorite I made with this set. The bright colors just make me think of rainbows and springtime, and maybe by the end of this week the snow will finally melt on the north side of my house! Anyways, I just repeatedly stamped the heart image from Chalkboard Sign with Memento ink. The colors I used are Lady Bug, Tangelo, Cantaloupe and Dandelion. I then stamped a simple "sending love" sentiment in black from the Packaged Pretty set. Really a fun set for gift giving and card-making alike!


Next is a 6x6 card made with the Let's Chat set, one of the February release sets. I happened to have some turquoise cardstock in my stash that matched one of my inks pretty nicely (Memento Bahama Blue). Paired up with some black and white chevron paper and a banner to highlight the sweet sentiment, I think it turned out pretty cute!


Thanks so much for visiting my blog today, I hope you enjoyed my projects.
(And if you missed it, I posted some Sweet projects on Tuesday for the March Release, go take a look!)

Tuesday, March 12, 2013

Sweet Stamp Shop March Release


It's the first day of Sweet Stamp Shop's March release today and I am lucky enough to be one of this month's guest designers! So please take a look at the sweet projects I have to share with you today (both new and old), then head on over to the Sweet Stamp Shop blog to check out the other designers and all of their gorgeous projects.

First up is this card that I made with one of the brand new sets 'Chalkboard Sign'. It has these fun images that can be combined with a black background and white ink for a true chalkboard look... or you can just ink them up in any ol' colors you like.

To create this card, start with a white card base, or in my case, start with a colored card base and cover it with white. (Can you believe I ran out of my favorite heavy weight white cardstock, so this was my workaround.) Then take a second piece of white cardstock, trim it a little smaller than the base, and punch or cut a circle. Trace your circle onto the card base with a pencil, and then line up and stamp the "I love you" sentiment in red within the circle and erase the pencil marks. Then stamp the cardstock with the circle punched out with the arrow stamp in black. Repeatedly stamp the arrow all the way around the circle. Then to give the card some dimension, use foam adhesive to layer the arrows over the card base and sentiment. Easy!


Next up is a card I made several months ago but never blogged about it (my blog is brand new this year) This card uses the Sweet Stamp Shop set Happy Bugs. So many of Nicole's images work well with paper piecing, truly one of my favorite stamping techniques. It's a great way to add color to your images without actually coloring! And a great way to add patterned paper to your projects, while still keeping a CAS look. To make this one, I stamped the ladybug images on both the cardstock base and onto red patterned paper. I then cut out the red ladybug wings and adhered them to the card, popping them up with foam squares. A stamped sentiment, and a little patterned paper and ribbon along the side finish off the card.


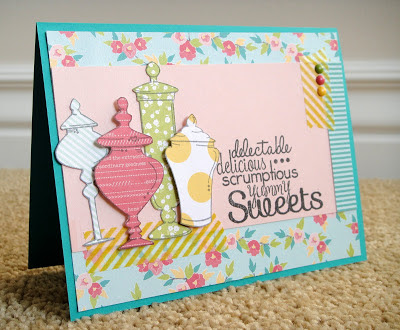
Finally, I'm sharing a tag that I made with the set Jars of Sweets. I had this tag up on my blog not too long ago, but this is another project using paper piecing so I couldn't resist sharing again. You can give these jars a completely different look just by switching up your patterned papers. Patterned paper + stamps = LOVE (in my opinion)


Thanks so much for stopping by today. And a huge thanks to Nicole at Sweet Stamp Shop for inviting me to take part in today's release!
(and stay tuned... I'll be back with more SSS projects soon)

Sunday, March 3, 2013

Use It Tuesday - uninked stamps

Participating in Use It Tuesday challenges is always a fun way to use up my stash of supplies and tools. This week's Challenge #50 - Uninked Stamps was no exception. (as a bonus - Use Gold)
I have some butterfly stamps that I won in a prize pack that I had yet to use. (Making Memories 'clear stamps butterfly') I inked them up with Memento Tuxedo Black ink and made my own background image. Honestly, I was just too lazy to do any fussy cutting and masking, so with the black ink I just made sure the images were touching each other, without overlapping. I stamped the large butterflies first, then filled in spaces with the smaller ones.
It took me awhile to figure out what to do next. I had this beautiful bold background on a piece of white cardstock, but how to use it? In the end I kept it simple, trimming it down to cover about 2/3 of a golden yellow A2-sized card (my attempt at adding GOLD to my project), popped it up with foam squares, then added a big yellow-green bow. The ribbon is an old item too - I won it as a prize about 1 1/2 years ago, and this is the first time I've used it.
 Thanks Use It Tuesday for the inspiration this week!
  
Posted by Picasa

Saturday, March 2, 2013

S.W.A.T. Drill #3 - 4 photos on one page

*Note: If you are looking for the ScrapbookSteals.com March Blog Hop, please see this post.


The next drill on the S.W.A.T. blog is to create a single page layout using 4 photos. 

This time, one lucky entry will win a $20 gift card to 3 Scrappy Boys!

Here's my layout:
I've had these American Crafts 'Garden Cafe' papers and embellies in my stash for awhile, I'm glad to finally get some good use out of them!

Create your layout and link it up at S.W.A.T. by March 25th. 
I can't wait to see what you make, 4 photos on a single page was a challenge for me!

Have a fantastic, crafty weekend everyone!

Friday, March 1, 2013

ScrapbookSteals.com Blog Hop - Love My Tapes

Welcome to your next stop on the March ScrapbookSteals.com Blog Hop!

I'm so happy to be a part of the hop today. I've been a regular ScrapbookSteals.com blog reader and participant in their weekly layout sketches and crafty challenges for almost 2 years now. I find tons of inspiration on their blog, and find most of my scrapbooking supplies by shopping their daily deals!

Today's steal and the subject of the blog hop is, of course, Love My Tapes washi tape. I received two beautiful tapes to work with - pink stripes and teal chevron. The two colors looked so lovely together I thought I'd make a card to showcase the colors. A couple simple strips of the washi tape, ribbons from my stash, a black sentiment and simple flower image, and there you have it:
 
Then I lined up strips of Love My Tapes washi tape on pieces of white cardstock to create my own patterned paper. Since the tape is semi transparent, I could make a nice criss-cross or woven look with the striped washi.

 Adding washi tape to cardstock like this makes it easy to punch out shapes like these tags.
 

I then dressed up the tags with more punched shapes, flower embellishments and baker's twine. These will be great to dress up gift packages or even add to a card or layout!
  
Be sure to leave a comment for me here on my blog, and on all the other participating blogs by Sunday March 3rd so you can be entered for a chance to win a $20 gift certificate to ScrapbookSteals.com!
 
Your next stop on the blog hop is the fabulous Jessica Arrant
You're going to love what she has in store for you!
BLOG DESIGN BY DESIGNER BLOGS